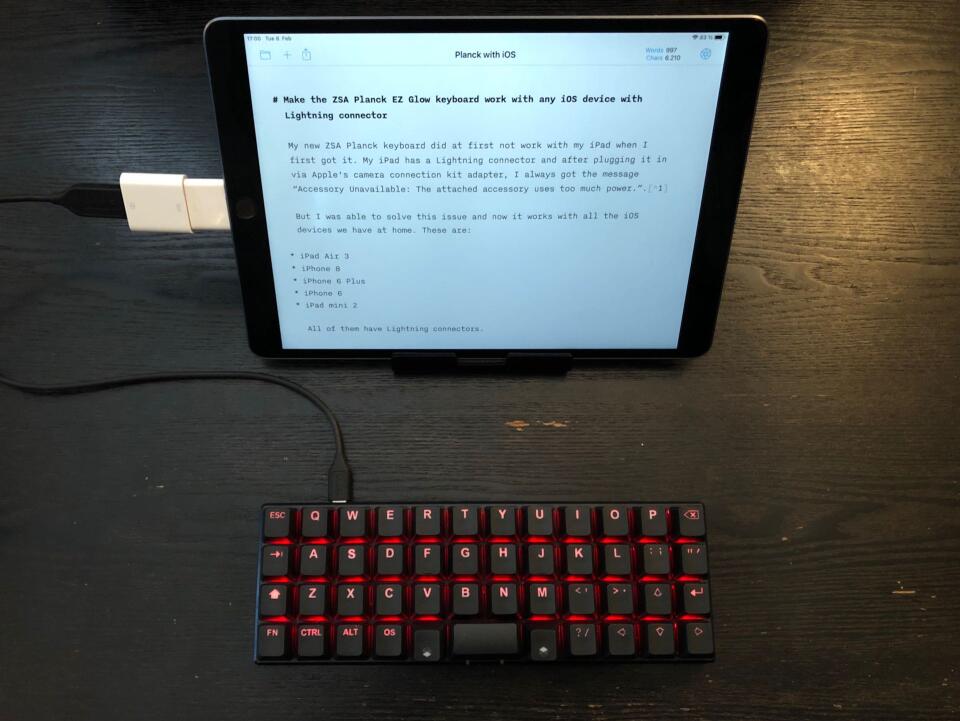
Make the ZSA Planck EZ Glow keyboard work with any iOS device with Lightning connector
My new ZSA Planck keyboard did at first not work with my iPad. The iPad has a Lightning connector and after plugging it in via Apple’s camera connection kit adapter, I always got the message “Accessory Unavailable: The attached accessory uses too much power.”.1
But I was able to solve this issue and now it works with all the iOS devices we have at home. These are:
- iPad Air 3
- iPhone 8
- iPhone 6 Plus
- iPhone 6
- iPad mini 2
All of them have Lightning connectors.
TL;DR
You can connect the Planck via Apple’s camera connection kit adapter and a USB-C to USB-A cable2.
But before you can connect the Planck to your iOS device, you’ll need to configure and flash your firmware with a conventional computer. Here are – in short – the steps you need to take:
- Download the source files for your Oryx configuration.
- Add the line
#define USB_MAX_POWER_CONSUMPTION 100to config.h. - Remove the line
#define STARTUP_SONG SONG(PLANCK_SOUND)from config.h. - Compile your configuration using ZSA’s QMK fork.
- Flash the resulting .bin file onto your Planck using Wally.
- Dim the keyboard’s LEDs.
If this all sounds familiar to you, that’s all you need to know. If one or more of those points sound like they need more explanation, read on, as I explain each of them in a little more detail below.
1. Download the source files for you Oryx configuration.
When you’re reading this, I’m sure you’re familiar with ZSA’s Oryx configuration tool.
So, once you’re at the step where you can download your keyboard layout, there’s an option to “Download Source”. Do just that!
2. Add the line #define USB_MAX_POWER_CONSUMPTION 100 to config.h.
In the *_source folder are three files. One of them is config.h. This is the one you need to edit.
And this is a tip I got from various posts on Reddit. Consensus is, you need to set USB_MAX_POWER_CONSUMPTION to 100 in order for an iOS device to not give you the “…consumes too much power” warning. So I added the following statement to the end of my config.h:
#define USB_MAX_POWER_CONSUMPTION 100
I’m not sure whether this makes the keyboard actually consume less power (the default setting is at 500), or whether this only tells the device that the keyboard only consumes 100 mA. But anyway, it works.
But you have more to do, to make it work:
3. Remove the line #define STARTUP_SONG SONG(PLANCK_SOUND) from config.h.
Remove or comment out the following lines in config.h:
#ifdef AUDIO_ENABLE
#define STARTUP_SONG SONG(PLANCK_SOUND)
#endif
This will disable the apparently power-consuming start-up sound. In my case, the Planck still makes a sound upon successful connection – just a different one that’s not so extravagant.
Alternatively, you can probably “Disable Audio” in the Oryx settings and then skip this whole step. But I didn’t test that nor did I want to have a completely silent keyboard.
4. Compile your configuration using ZSA’s QMK fork.
You need to compile your firmware from source. I won’t write down myself how to do this, because it’s well documented. I’ll just quote from the Readme file that’s included with your source files download from Oryx:
- Use the documentation at https://docs.qmk.fm/ to set up your environment for building your firmware.
- Build your layout against https://github.com/zsa/qmk_firmware/ which is our QMK fork (instead of qmk/qmk_firmware). This is what Oryx (the graphical configurator) uses, so it’s guaranteed to work.
- Create a folder with a simple name (no spaces!) for your layout inside the qmk_firmware/keyboards/planck/ez/glow/keymaps/ folder.
- Copy the contents of the *_source folder (in the .zip you downloaded from Oryx) into this folder.
- Make sure you’ve set up your environment per the QMK docs so compilation would actually work.
- From your shell, make sure your working directory is qmk*firmware, then enter the command
make planck/ez/glow:_layout_, substituting the name of the folder you created for “layout”.
One hint, though: when you get to “Build your layout against ZSA’s QMK fork” or “Run QMK Setup” in the QMK docs, you might need to first clone their repository manually, as simply running qmk setup currently does not work (because that repository has no master branch):
➜ ~ git clone git@github.com:zsa/qmk_firmware.git
5. Flash the resulting .bin file onto your Planck using Wally.
After compilation you’ll get a .bin file (among many others). Follow the normal procedure of flashing your keyboard firmware using this file (it gets stored to the .build folder after compilation).
6. Dim the keyboard’s LEDs.
Before disconnecting the keyboard from your computer, you need to dim the keyboard’s LEDs. With full LED brightness, you’ll still get the power consumption warning from your iOS devices. Dimming half way should be enough.
Don’t use music mode
There’s one more thing to be aware of: the ZSA Planck has a music mode. Don’t enable it while attached to your iOS device. Because, yes, you guessed it: power consumption warning.
And that’s it.

-
I don’t think iPads with a USB-C port have the same issue. You should be able to use your Planck simply using a USB-C to USB-C cable. ↩
-
I use the original camera connection kit that still has a 30-pin connector. If it works with that, I’m sure it works with all other adapters that came after it. Haven’t tested with third-party adapters. ↩